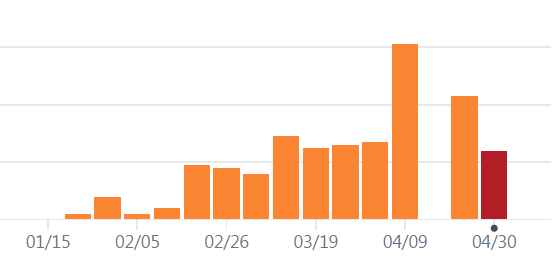
The number of commits per week. That big spike is us hacking away right before the deadline. The last two bars are commits for the final version released after the party.
The demoscene is about producing cool real time works (as in “runs on your computer”) called demos. Some demos are really small, say 64 kilobytes or less, and these are called intros. The name comes from “crack intros”. So an intro is just a demo that’s small.
I’ve noticed many people have interest in demoscene productions but have no idea how they are actually made. This is a braindump/post-mortem of our recent 64k intro Guberniya and I hope that it will be interesting to newcomers and seasoned veterans alike. This article touches basically all techniques used in the demo and should give you an idea what goes into making one. I refer to people with their nick names in this article because that’s what sceners do.
Windows binary download: guberniya_final.zip (61.8 kB) (somewhat broken on AMD cards)
It’s a 64k intro released at Revision 2017 demo party. Some numbers:
Demos are usually released at a demo party where the audience watches demos submitted to a competition and then votes for the winner. Releasing at a party is a great way to get motivated since you have a hard deadline and an eager audience. In our case it was Revision 2017, a big traditional demo party during the Easter weekend. You can view some photos to get an idea what the event is like.
The number of commits per week. That big spike is us hacking away right before the deadline. The last two bars are commits for the final version released after the party.
We started working on the demo early in January and released it on the Easter weekend in April during the party. You can watch a recording of the whole competition online if you wish :)
We were a team of six: cce (me), varko, noby, branch, msqrt, and goatman.
The song was done pretty early on, so I tried to design things around it. It was clear we needed something big and cinematic with memorable set pieces.
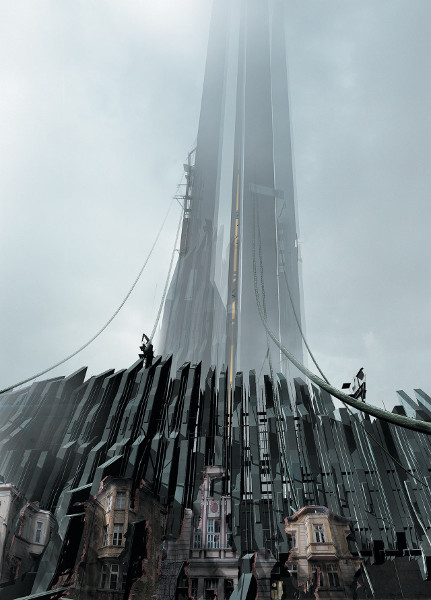
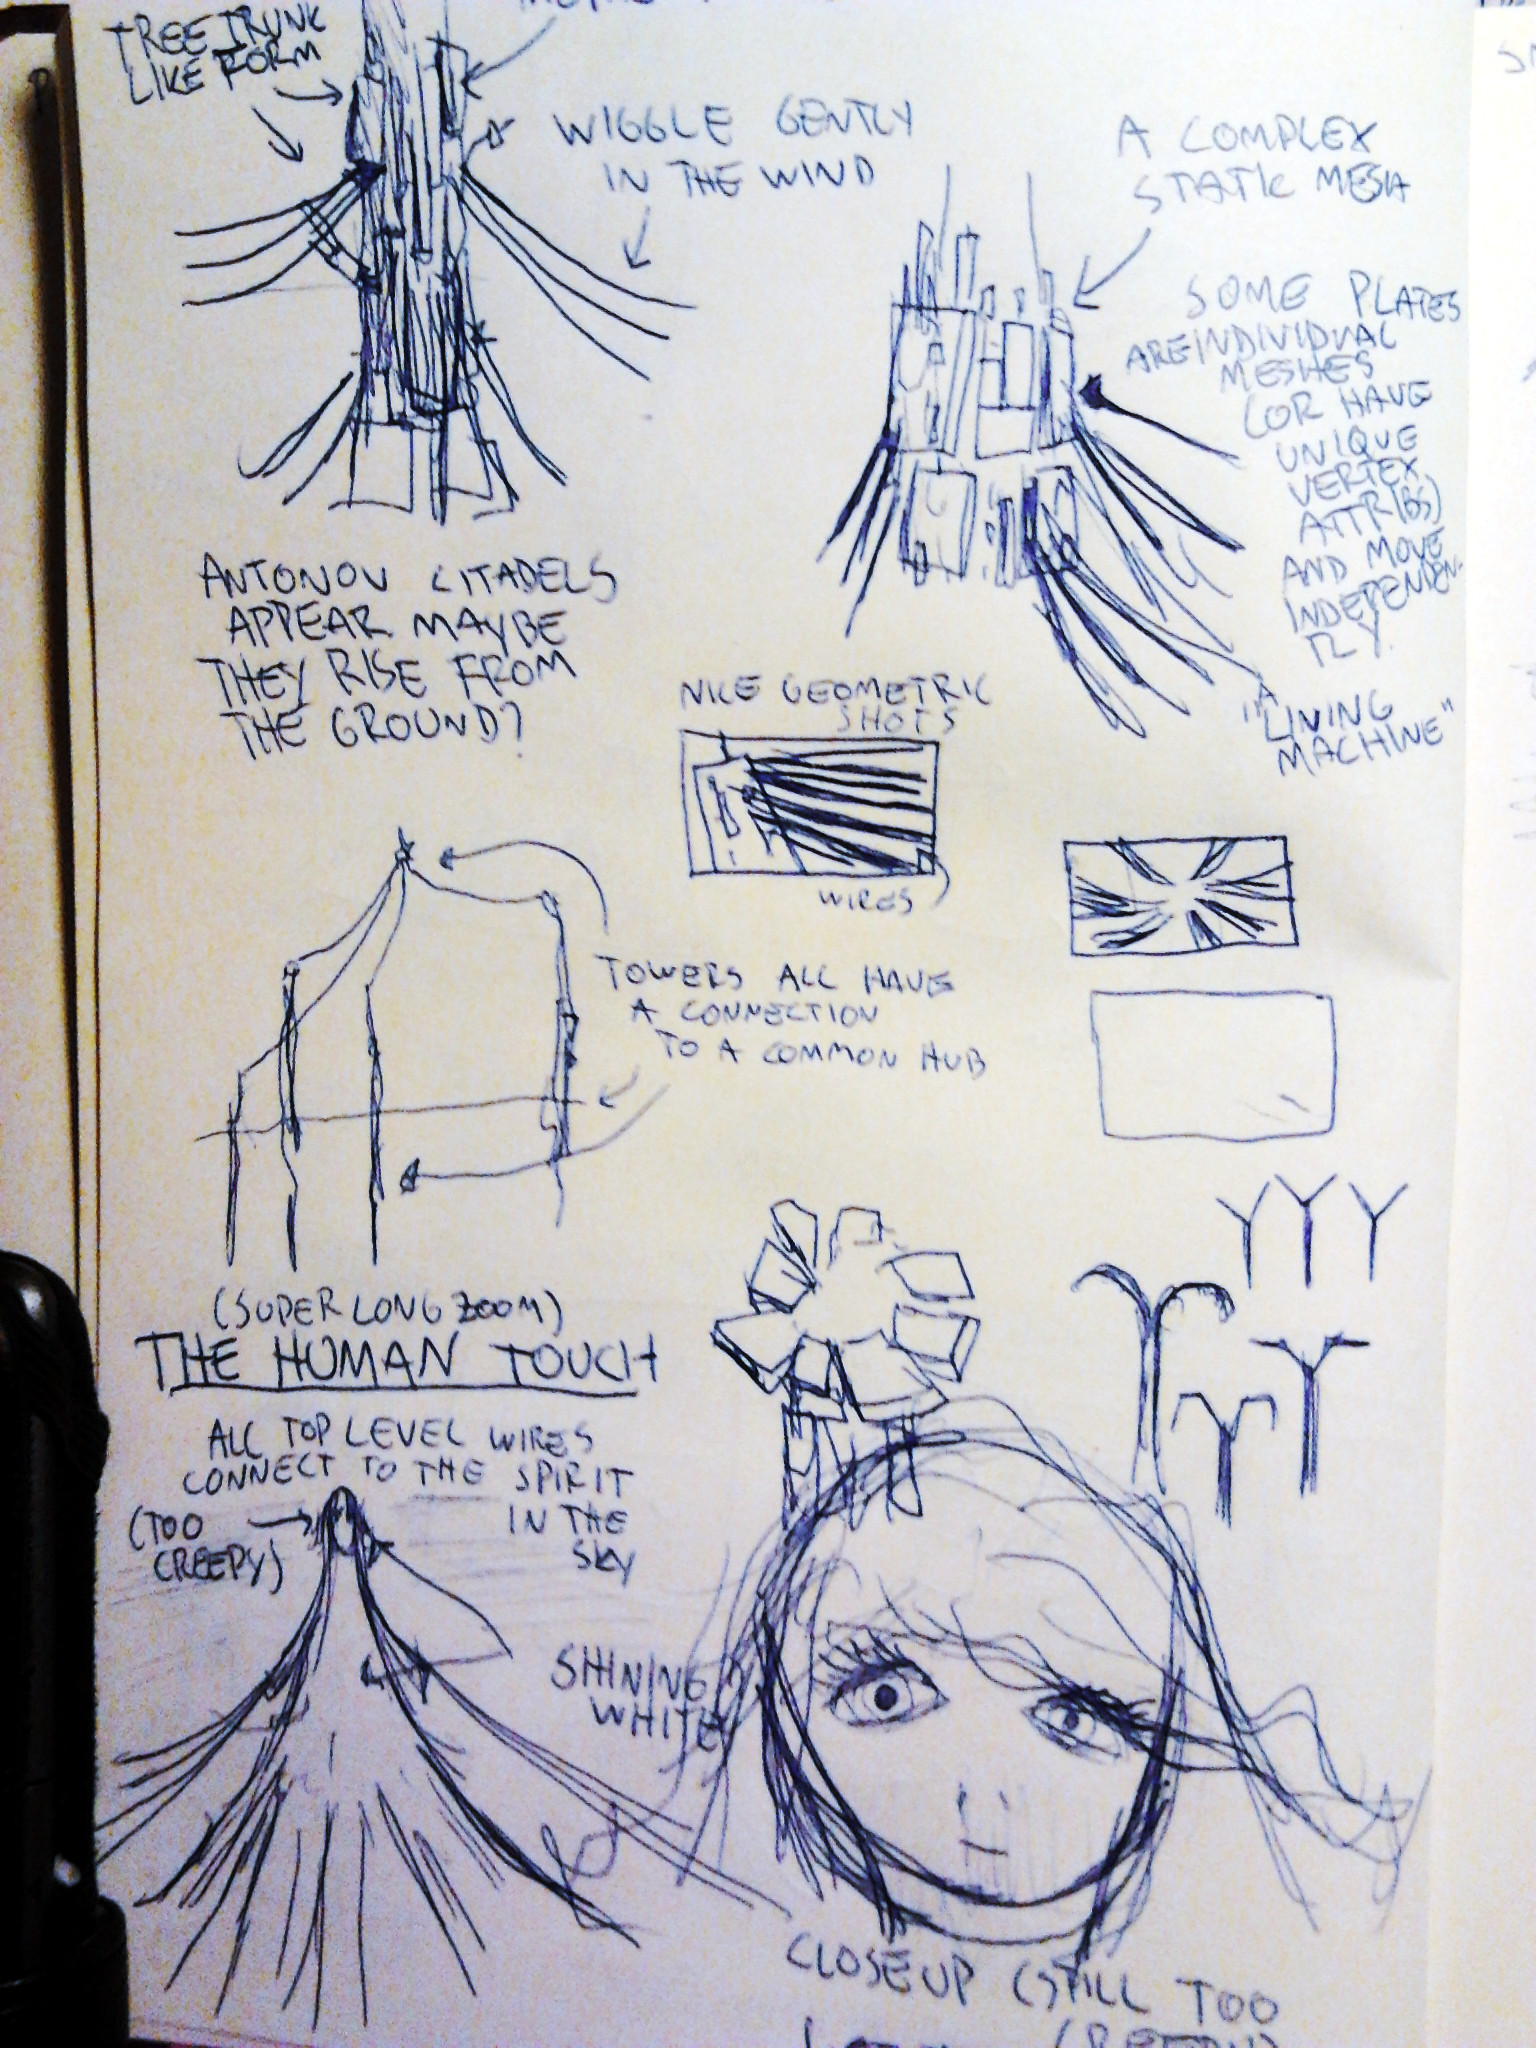
My original visual ideas centered around wires and their usage. I really liked Viktor Antonov’s designs and my first sketches were pretty much a rip-off of Half-Life 2:

Early sketches of citadel towers and ambitious human characters. Full size.
Viktor Antonov’s concept art in Half-Life 2: Raising the Bar.
The similarities are quite obvious. In the landscape scenes I was also trying to capture the mood of Eldion Passageway by Anthony Scimes.
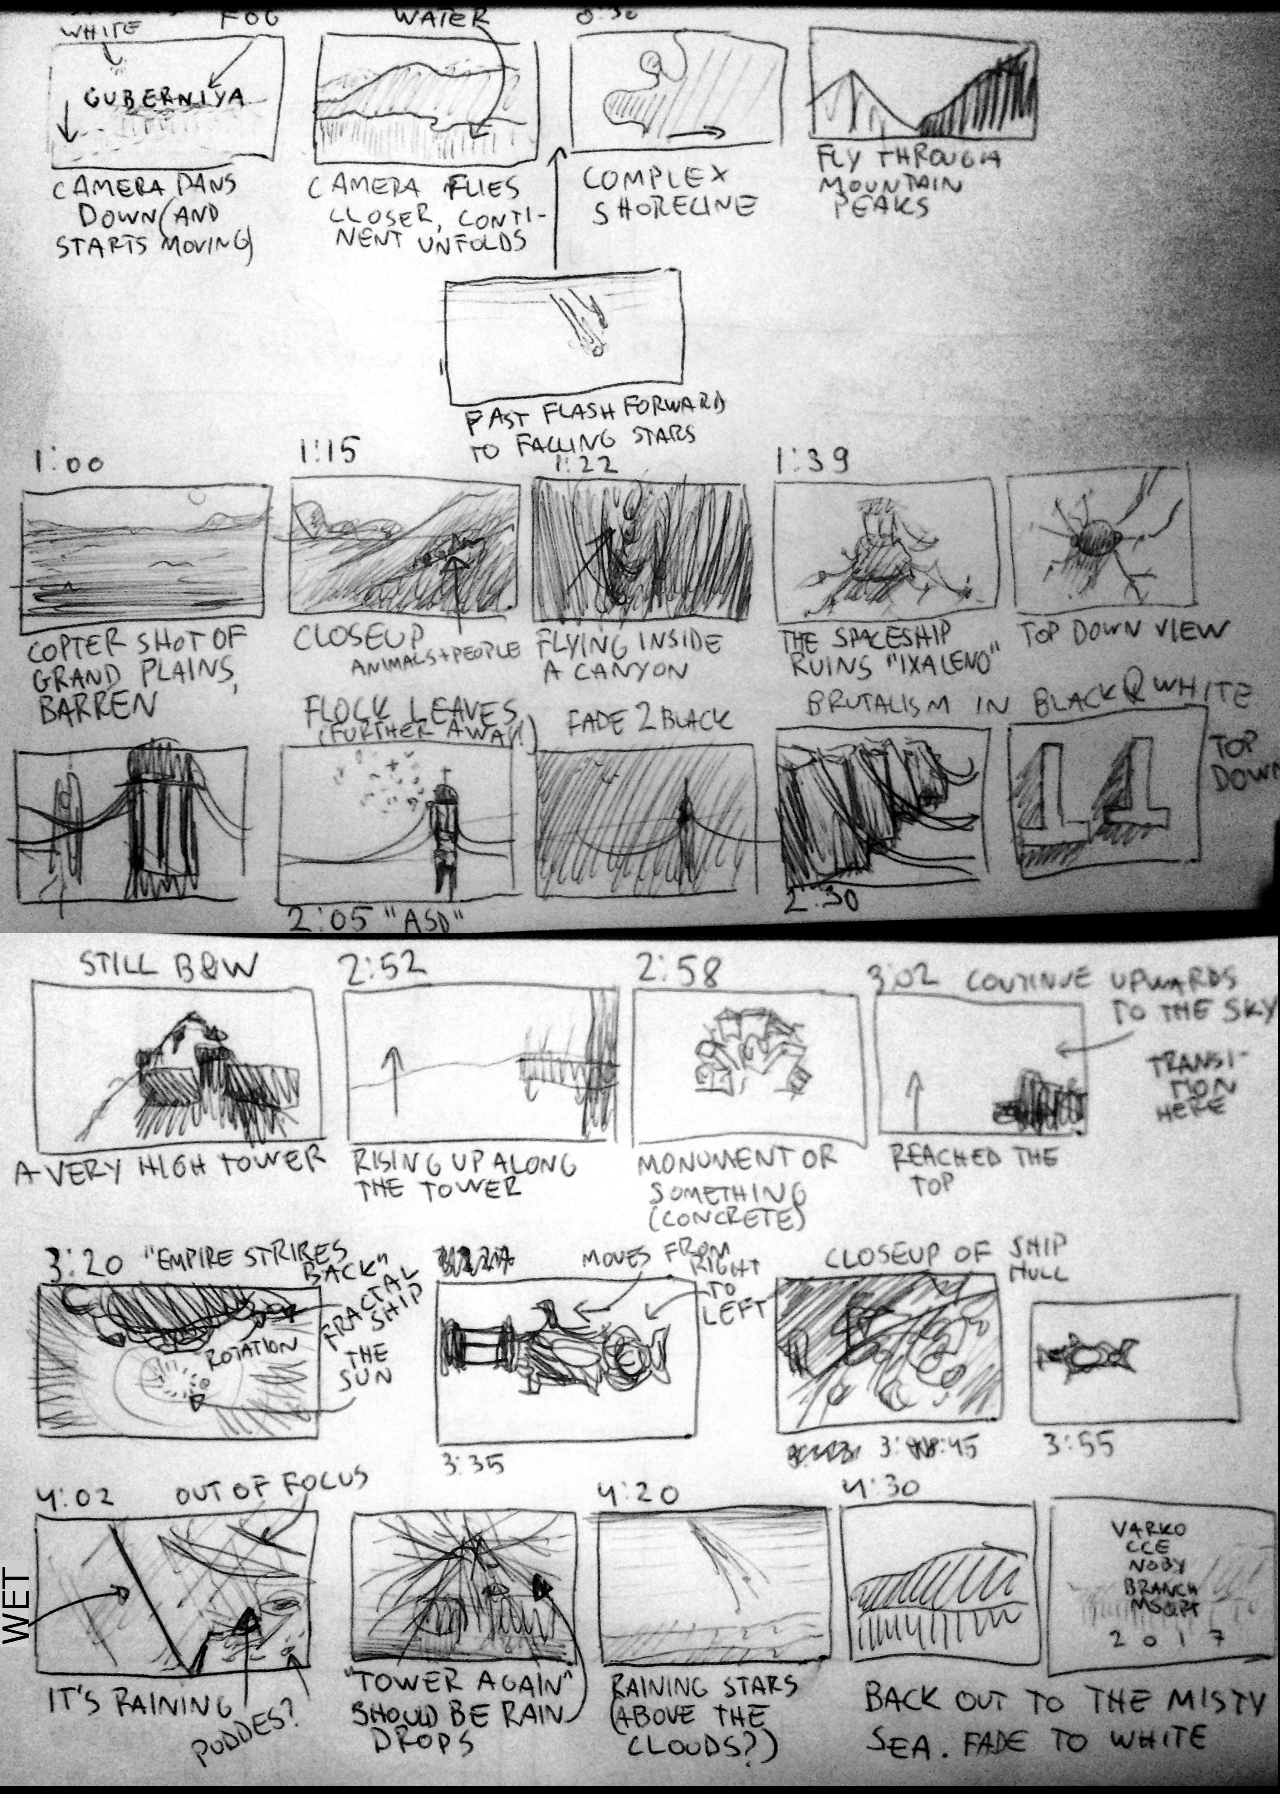
The landscape was inspired by this nice video of Iceland and also Koyaanisqatsi, I guess. I also had big plans for the story that manifested itself as a storyboard:
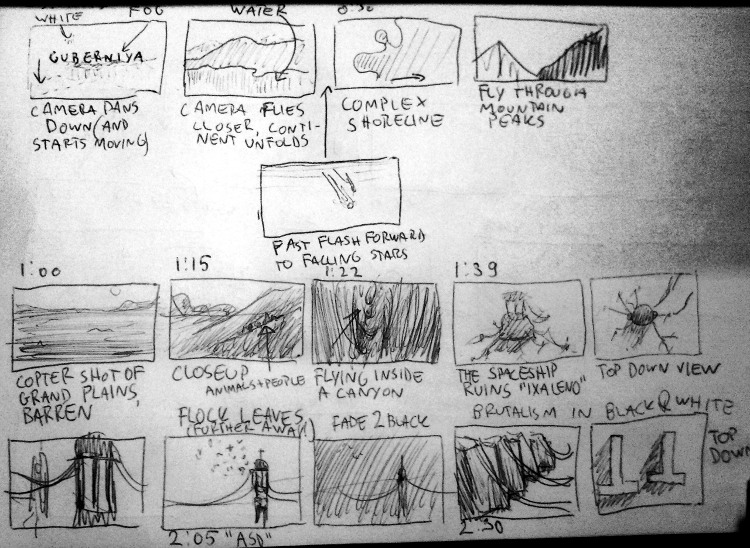
The storyboard differs from the final intro. For example the brutalist architecture was dropped. The full storyboard.
If I’d do this again I’d just settle with a timeline with a couple of photos that set the mood. It’s less work and leaves more room for imagination. But at least drawing it forced me to organize my thoughts.
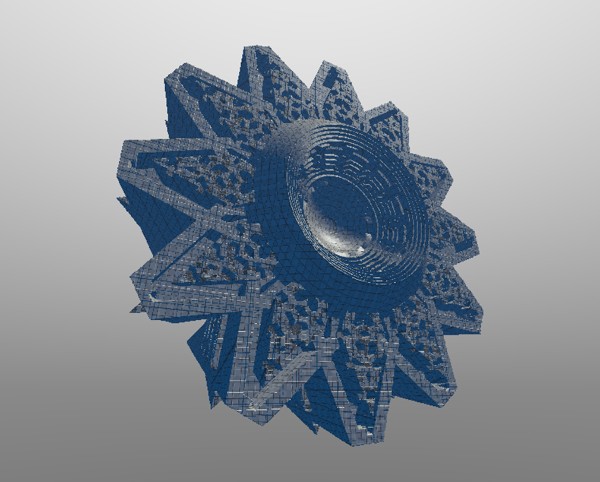
The spaceship was designed by noby. It is a combination of multiple Mandelbox fractals intersected with geometric primitives. The ship’s design was left a bit incomplete, but we felt it shouldn’t be further tampered with in the final version.
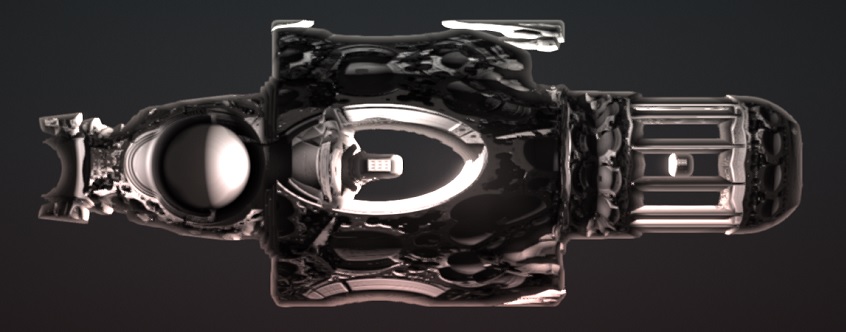
The spaceship is a raymarched distance field, just like everything else.
We had also another ship shader that didn’t get used. Now that I look at the design it’s also very cool and it’s a shame it didn’t find use in the intro.
A space ship design by branch. Full size
We started with a codebase built for our earlier intro Pheromone (YouTube). It had basic windowing and OpenGL boilerplate along with file system utility that packed files from a data directory to executable with bin2h.
We used Visual Studio 2013 to compile the project since it wouldn’t compile on VS2015. Our standard library replacement didn’t work well with the updated compiler and produced amusing errors like this:

Visual Studio 2015 didn’t play well with our codebase.
For some reason we stuck with VS2015 as an editor though and just compiled the project using the v120 platform toolkit.

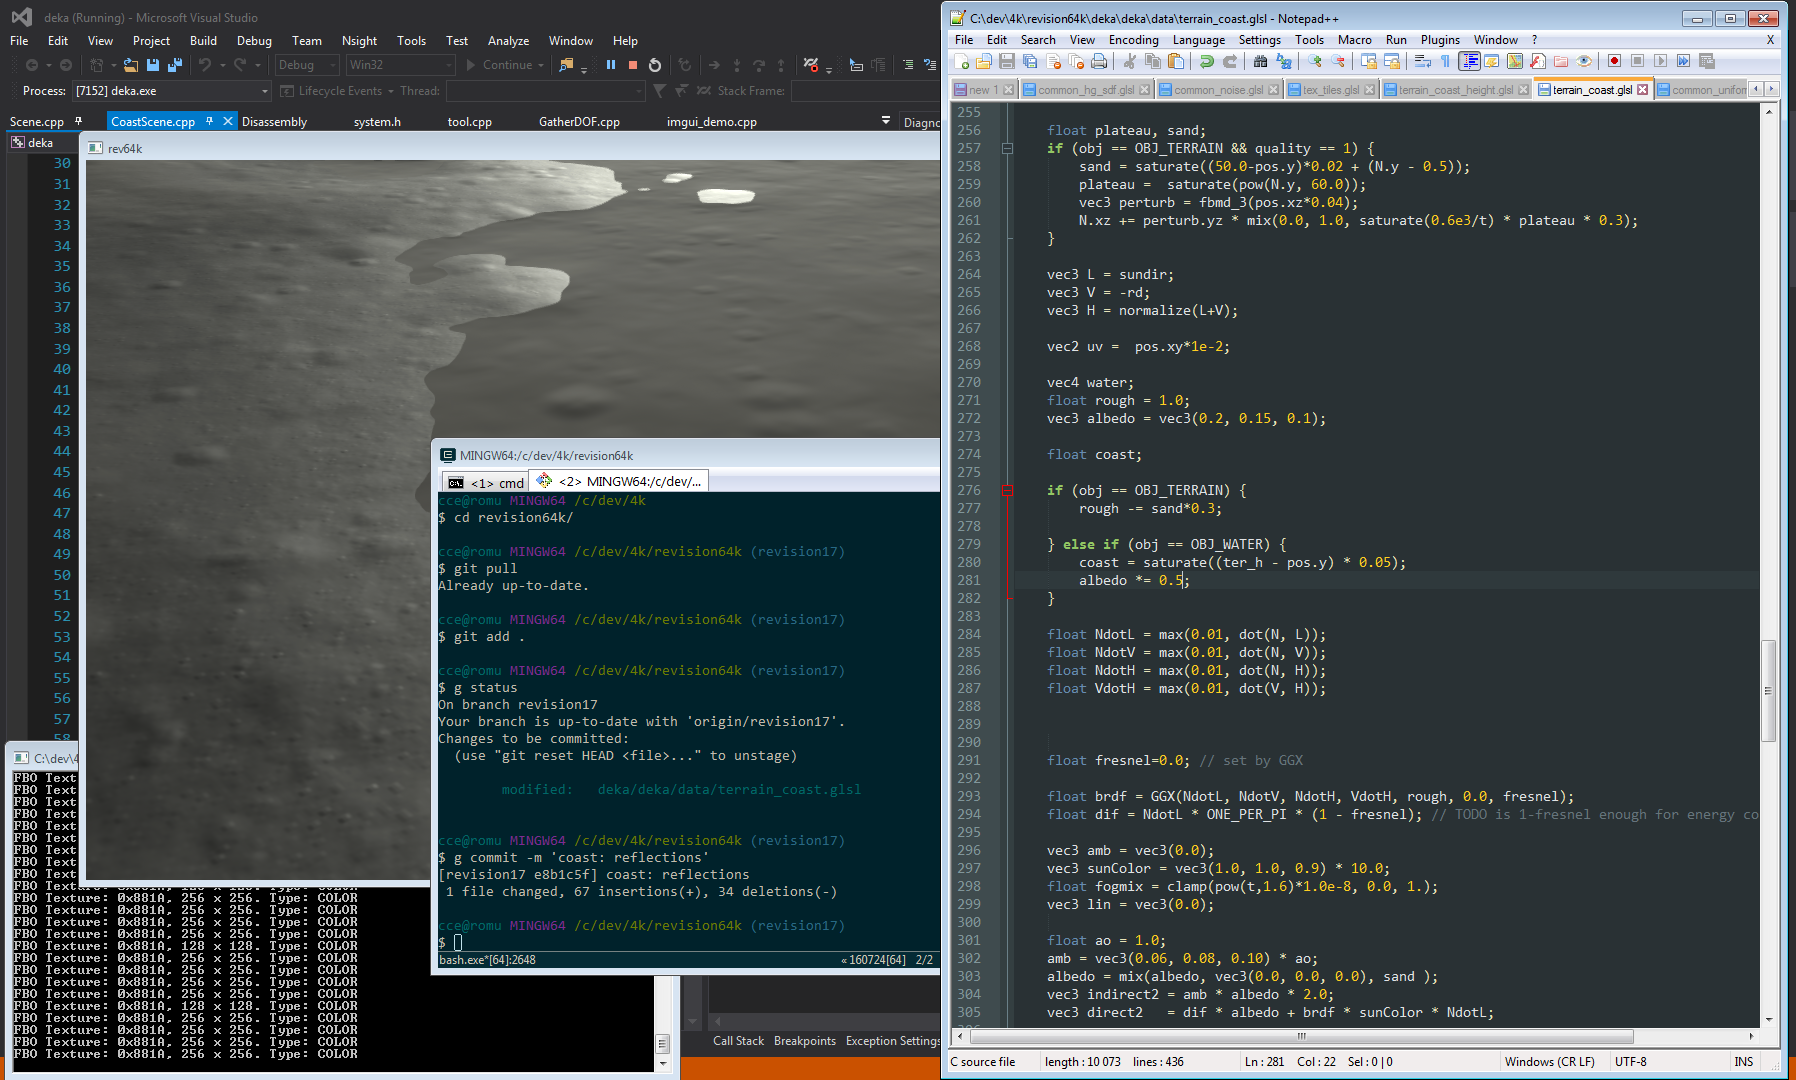
I made most of my work with the demo like this: shaders open in one window and the end result with console output in others. Full size.
We had a simple global keyboard hook that reloaded all shaders when CTRL+S key combination was detected:
// Listen to CTRL+S.
if (GetAsyncKeyState(VK_CONTROL) && GetAsyncKeyState('S'))
{
    // Wait for a while to let the file system finish the file write.
    if (system_get_millis() - last_load > 200) {
        Sleep(100);
        reloadShaders();
    }
    last_load = system_get_millis();
}
This worked really well and made live editing shaders much more fun. No need to have file system hooks or anything.
For animation and direction we used a GNU Rocket fork Ground Control. Rocket is a program for editing animation curves and it connects to the demo via a TCP socket. The keyframes are sent over when requested by the demo. It’s very convenient because you can edit and recompile the demo while keeping the editor open without losing the sync position. For the final release the keyframes are exported to a binary format. It has some annoying limitations though.
Moving the viewpoint with mouse and keyboard is very handy for picking camera angles. Even a simple GUI helps a lot when tweaking values.
We didn’t have a demotool unlike some people so we had to build it as we went a long. The excellent dear imgui library allowed us to easily add features as we needed them.
For example adding some sliders to control some bloom parameters is as simple as adding these lines inside the rendering loop (not to separate GUI code):
    imgui::Begin("Postprocessing");
    imgui::SliderFloat("Bloom blur", &postproc_bloom_blur_steps, 1, 5);
    imgui::SliderFloat("Luminance", &postproc_luminance, 0.0, 1.0, "%.3f", 1.0);
    imgui::SliderFloat("Threshold", &postproc_threshold, 0.0, 1.0, "%.3f", 3.0);
    imgui::End();
The end result:
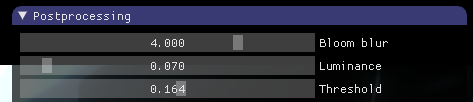
These sliders were easy to add.
The camera position can be saved by pressing F6 to a .cpp file, so the next time the code is compiled it will be included. This avoids the need for a separate data format and the related serialization code, but this solution can also get pretty messy.
The key to small executables is scrapping the default standard library and compressing the compiled binary. We used Mike_V’s Tiny C Runtime Library as a base for our own library implementation.
The binaries are compressed with kkrunchy, which is a tool made for exactly this purpose. It operates on standalone executables so you can write your demo in C++, Rust, Object Pascal or whatever. To be honest, size wasn’t really a problem for us. We didn’t store much binary data like images so we had plenty of room to play with. We didn’t even remove comments from shaders!
Floating point code caused some headaches by producing calls to nonexistent standard library functions. Most of these were eliminated by disabling SSE vectorization with the /arch:IA32 compiler switch and removing calls to ftol with the /QIfst flag that generates code that doesn’t save the FPU truncation mode flags. This is not a problem because you can set the floating point truncation mode at the start of your program with this snippet courtesy of Peter Schoffhauzer:
// set rounding mode to truncate
//  from http://www.musicdsp.org/showone.php?id=246
static short control_word;
static short control_word2;

inline void SetFloatingPointRoundingToTruncate()
{
    __asm
    {
        fstcw   control_word                // store fpu control word
        mov     dx, word ptr [control_word]
        or      dx, 0x0C00                  // rounding: truncate
        mov     control_word2, dx
        fldcw   control_word2               // load modfied control word
    }
}
You can read more about these things at benshoof.org.
Calling pow still generated a call to __CIpow intrinsic function that didn’t exist. I couldn’t figure out its signature on my own but I found an implementation in Wine’s ntdll.dll that revealed that it expects two double precision floats in registers. Now it was possible to make a wrapper that calls our own pow implementation:
double __cdecl _CIpow(void) {
    // Load the values from registers to local variables.
    double b, p;
    __asm {
        fstp qword ptr p
        fstp qword ptr b
    }

    // Implementation: http://www.mindspring.com/~pfilandr/C/fs_math/fs_math.c
    return fs_pow(b, p);
}
If you know a nicer way to fix this, please let me know.
When you can’t depend on SDL or similar you need to use plain WinAPI to do the necessary plumbing to get a window on screen. If you are suffering through this, these might prove helpful:
Note that we only load the function pointers for OpenGL functions that are actually used in the production in the latter example. It might be a good idea to automate this. The functions need to be queried with string identifiers that get stored in the executable, so loading as few functions as possible saves space. Whole Program Optimization might eliminate all unreferenced string literals but we couldn’t use it because of a problem with memcpy.
Rendering is mostly raymarching and we used the hg_sdf library for convenience. Íñigo Quílez (from now on called just iq) has written lots about this and many of the techniques. If you’ve ever visited ShaderToy you should be familiar with this already.
Additionally, we had the raymarcher output a depth buffer value so we could intersect signed distance fields with rasterized geometry and also apply post-processing effects.
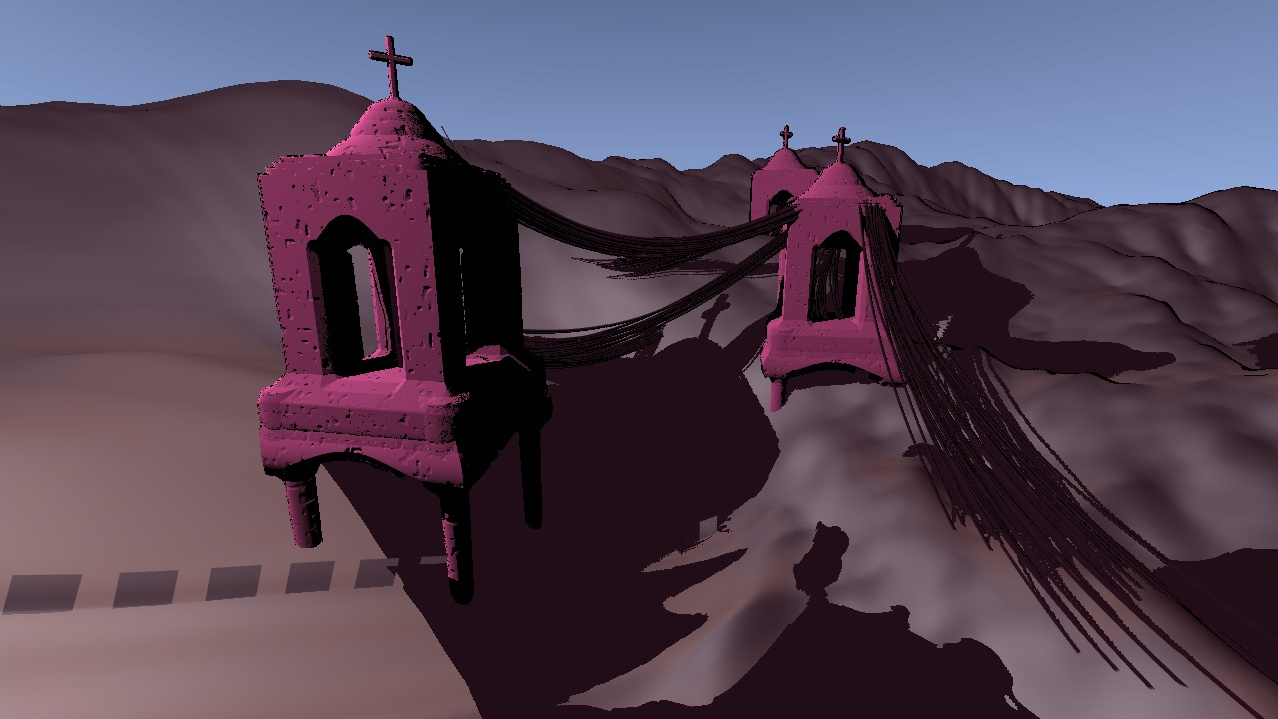
We use standard Unreal Engine 4 shading (here’s a big pdf that explains it) with a GGX lobe. It isn’t very visible but makes a difference in highlights. Early on our plan was to have an unified lighting pipeline for both raymarched and rasterized shapes. The idea was to use deferred rendering and shadow maps, but this didn’t work at all.
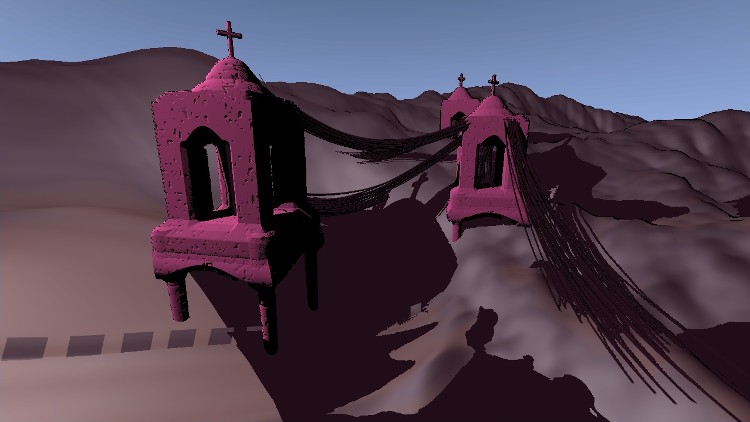
An early experiment with shadow mapping. Note how both the towers and the wires cast a shadow on the raymarched terrain and also intersect correctly. Full size.
Rendering huge terrains with shadow maps is super hard to get right because of the wildly varying screen-to-shadow-map-texel ratio and other accuracy problems. I wasn’t really in the mood to start experimenting with cascaded shadow maps either. Also, raymarching the same scene from multiple points of view is slow. So we just decided to scrap the whole unified lighting thing. This proved to be a huge pain later when were trying to match the lighting of the rasterized wires and raymarched scene geometry.
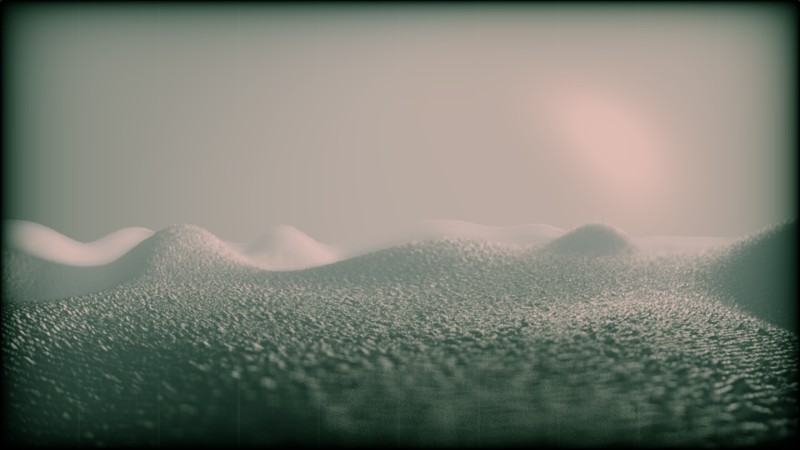
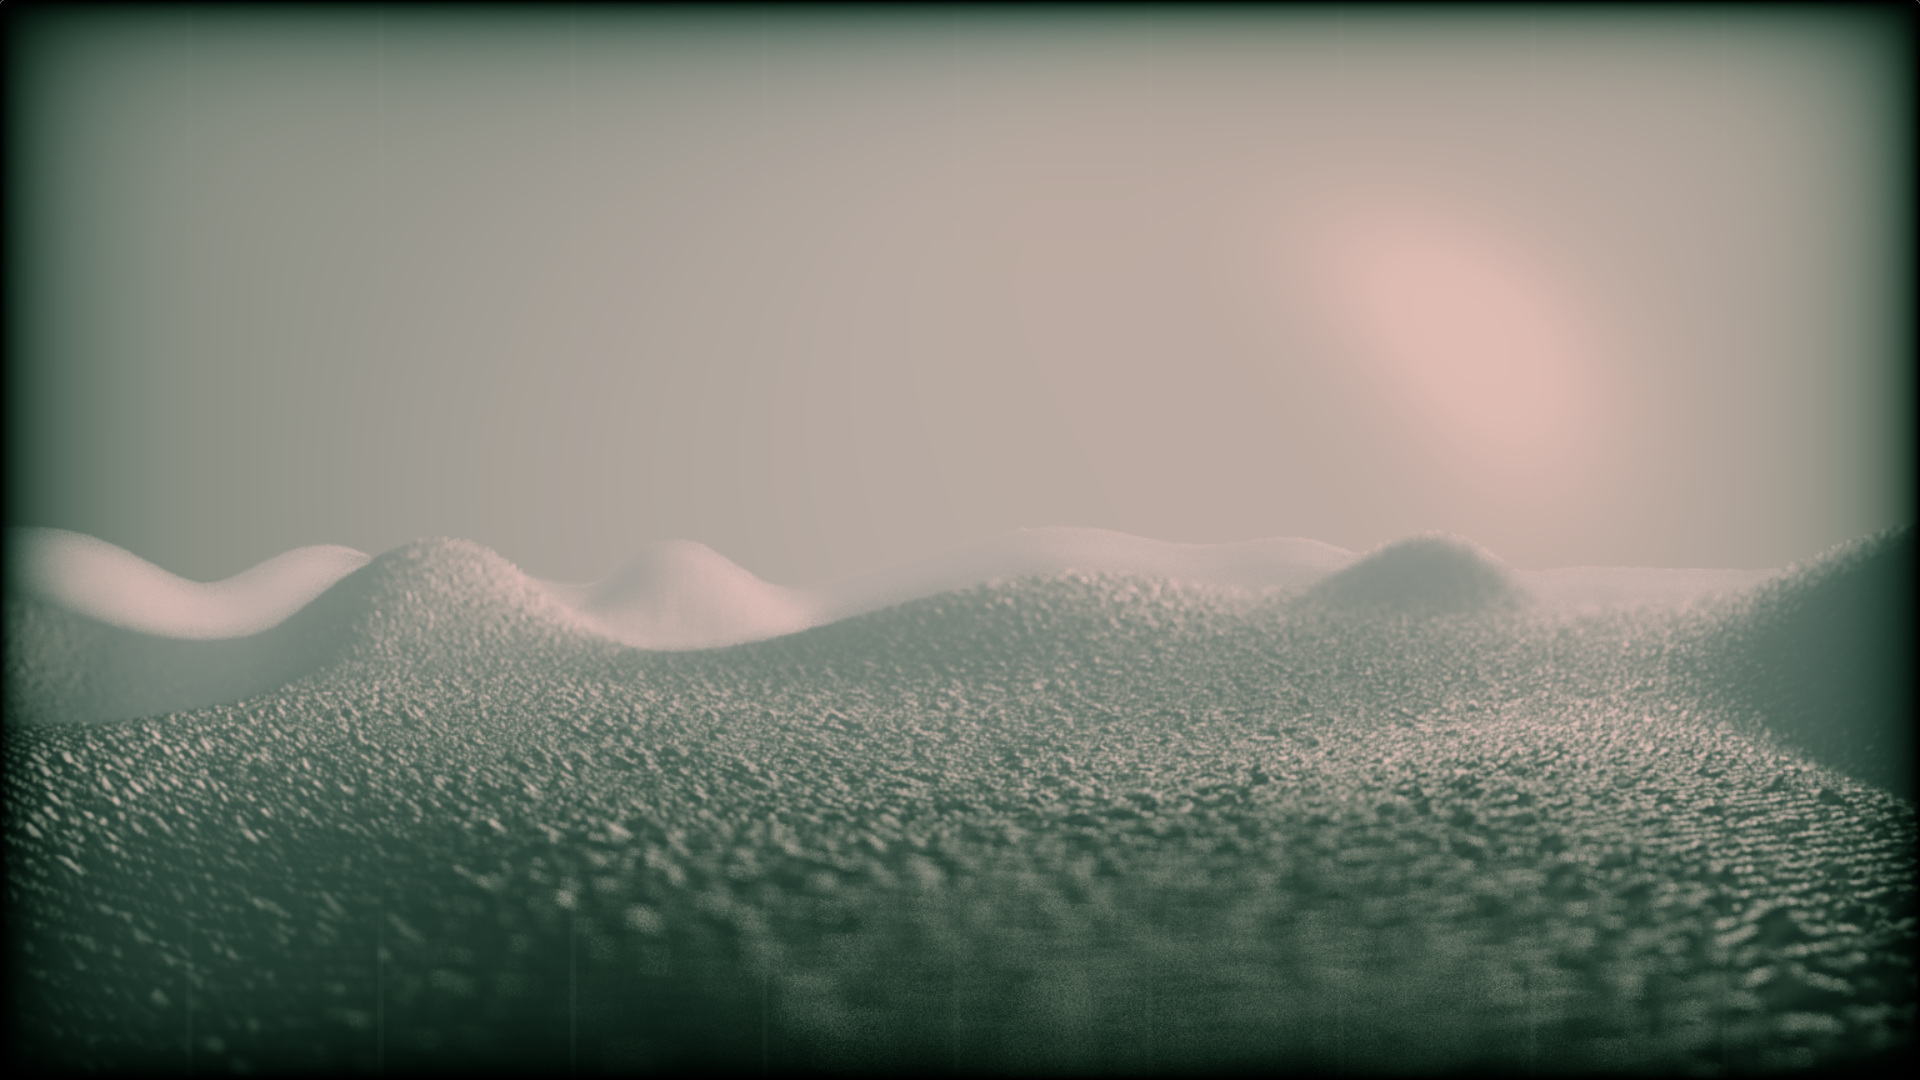
The terrain is raymarched value noise with analytic derivatives.1 The generated derivates are used for shading of course, but also to control ray stepping length to accelerate ray traversal on smooth regions, just like in iq’s examples. If you want to learn more you you can read more about this technique in this old article of his or play around with his awesome rainforest scene on ShaderToy. The landscape heightmap became much more realistic after msqrt implemented exponentially distributed noise.
Early tests of my own value noise terrain implementation.
A terrain implemented by branch that wasn’t used. I can’t remember why. Full size.
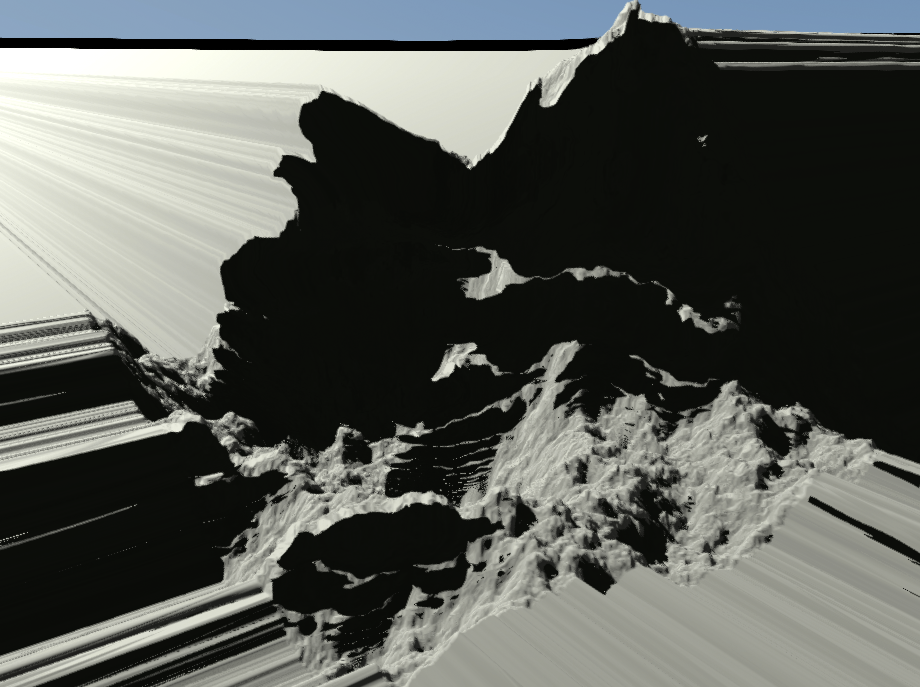
The landscape effect is very slow because we do brute force shadows and reflections. The shadows use a soft shadow hack in which the penumbra size is determined by the closest distance encountered during shadow ray traversal. They look pretty nice in action. We also tried using bisection tracing to speed it up but it produced too many artifacts to be useful. Mercury’s (another demogroup) raymarching tricks on the other hand helped us to eke out some extra quality with the same speed.
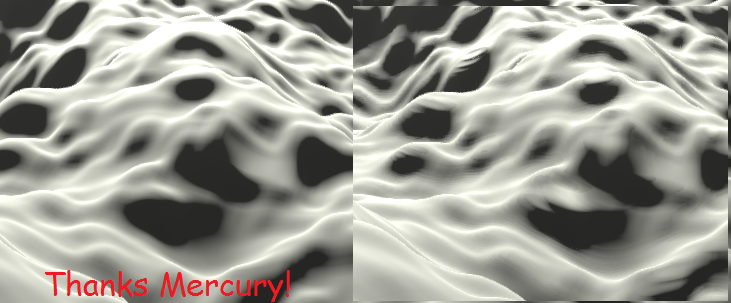
Landscape rendering with fixed point iteration enhancement (left) and with regular raymarching (right). Note the nasty ripple artifacts in the picture on the right.
The sky is built using pretty much the same techniques as described by iq in behind elevated, slide 43. Just some simple functions of the ray direction vector. The sun outputs pretty large values to the framebuffer (>100) so it adds some natural bloom as well.
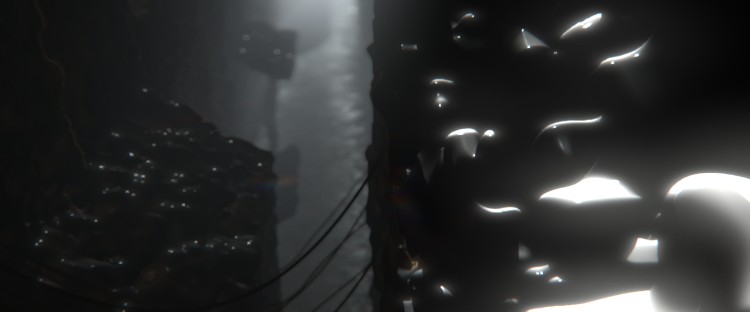
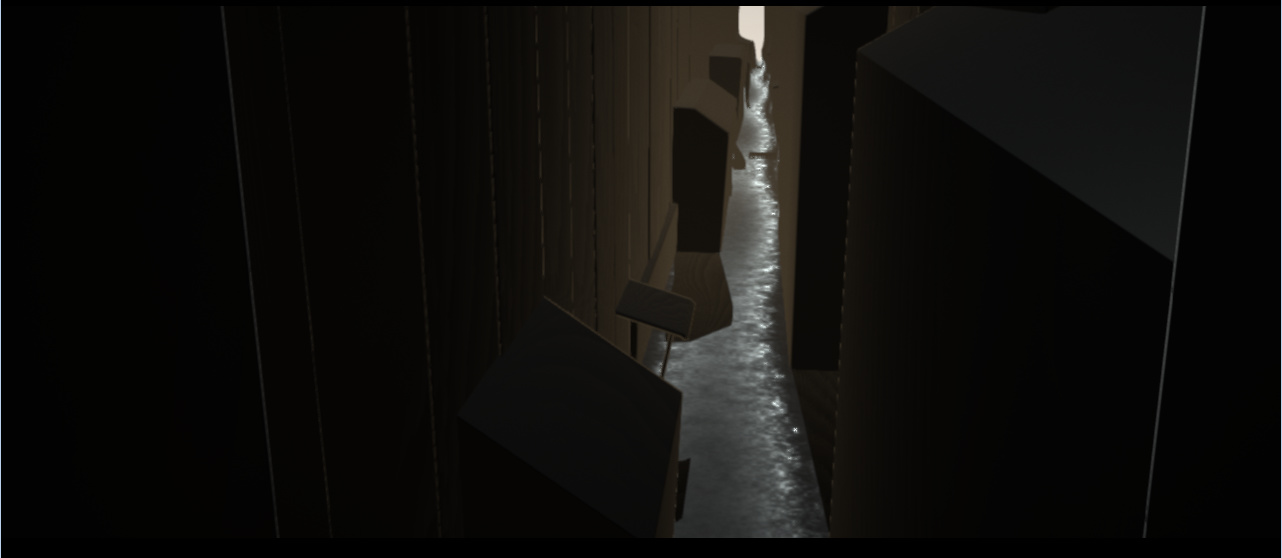
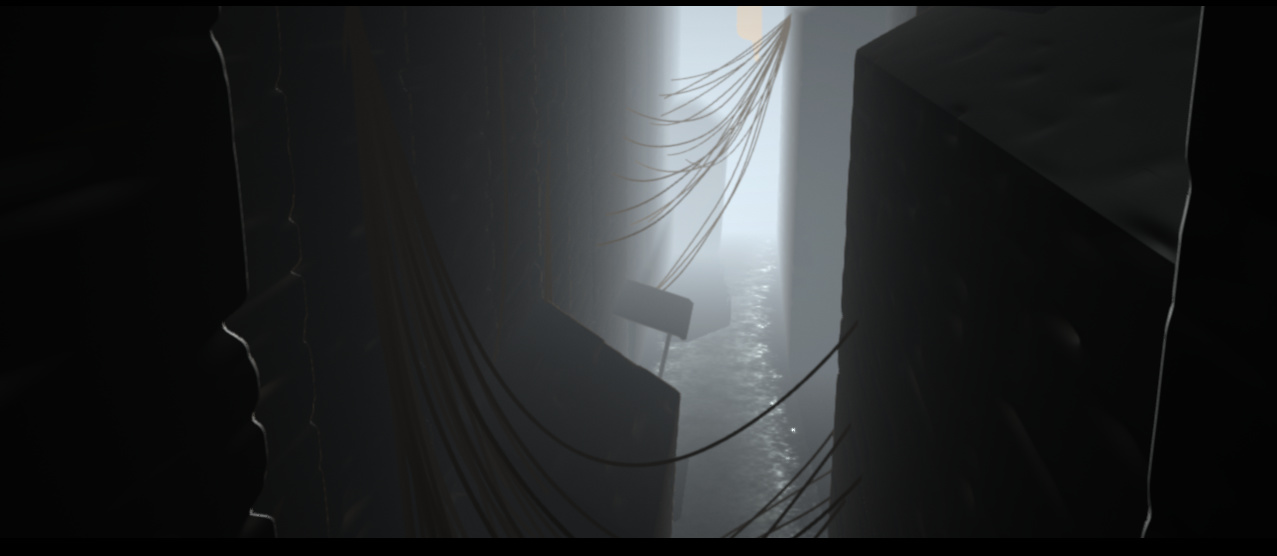
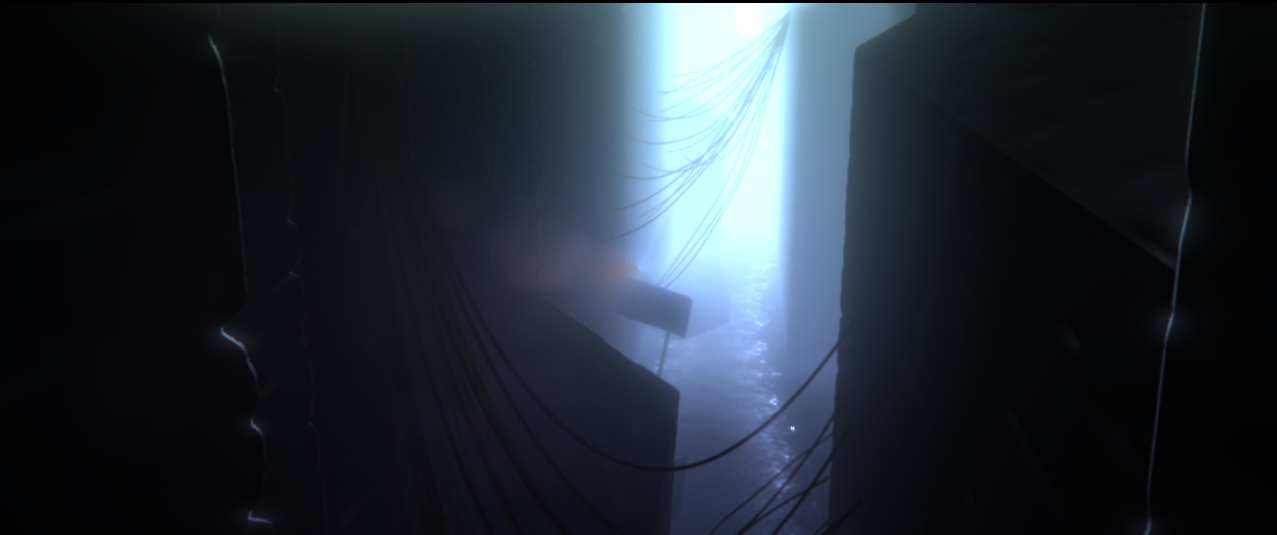
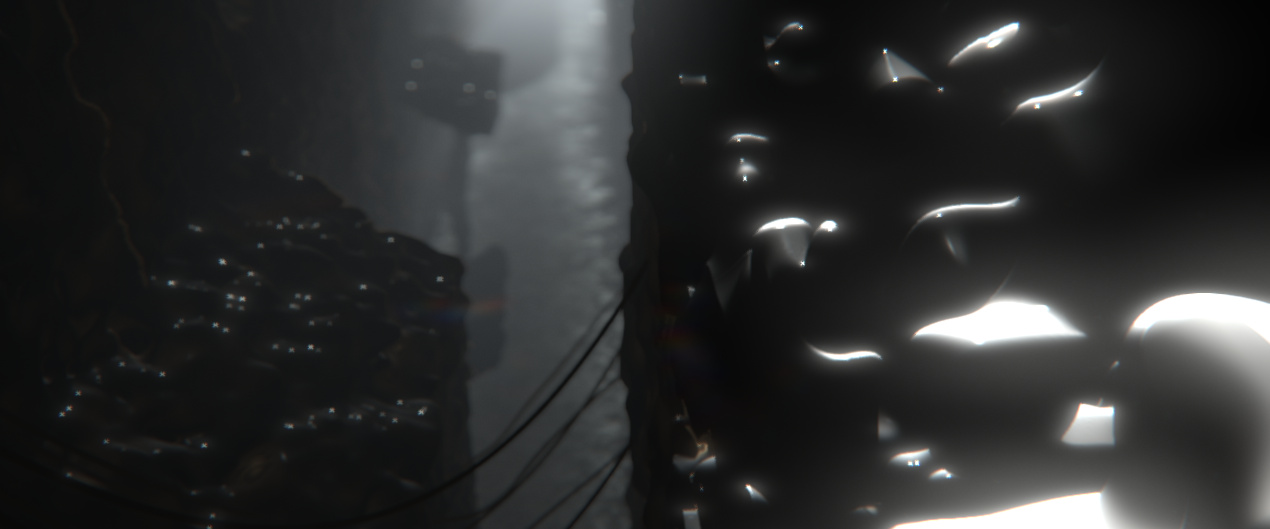
This is a view that was inspired by Fan Ho’s photography. Our post-processing effects really make it come together even though the underlying geometry is pretty simple.

An ugly distance field with some repeated blocks. Full size.
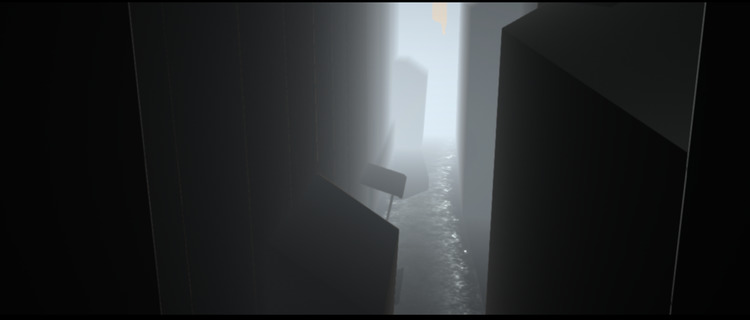
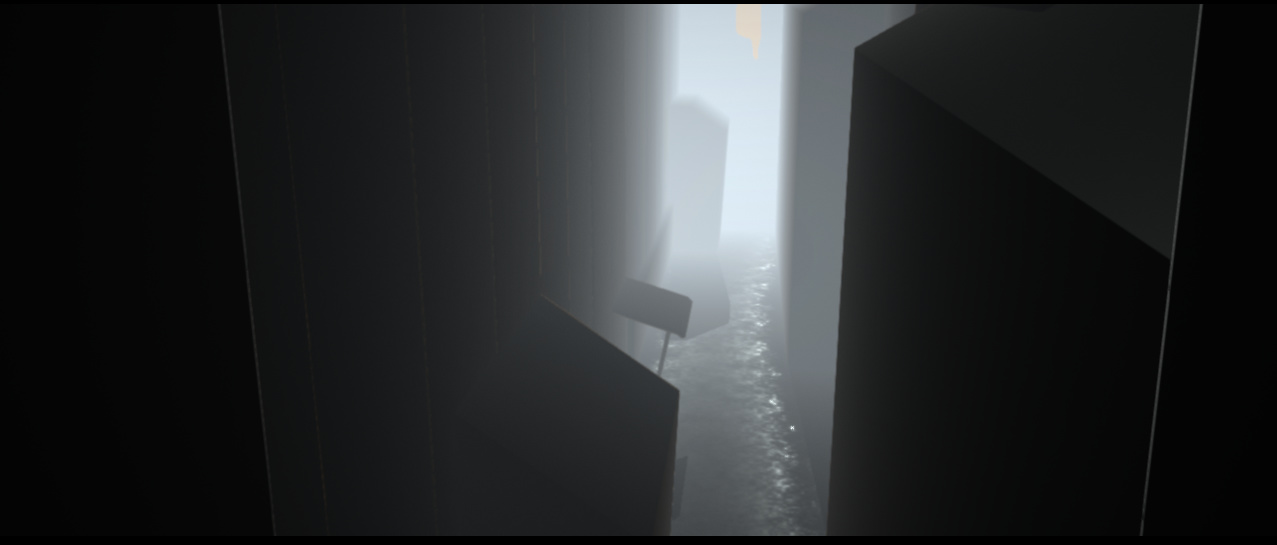
Add some exponential distance fog. Full size.

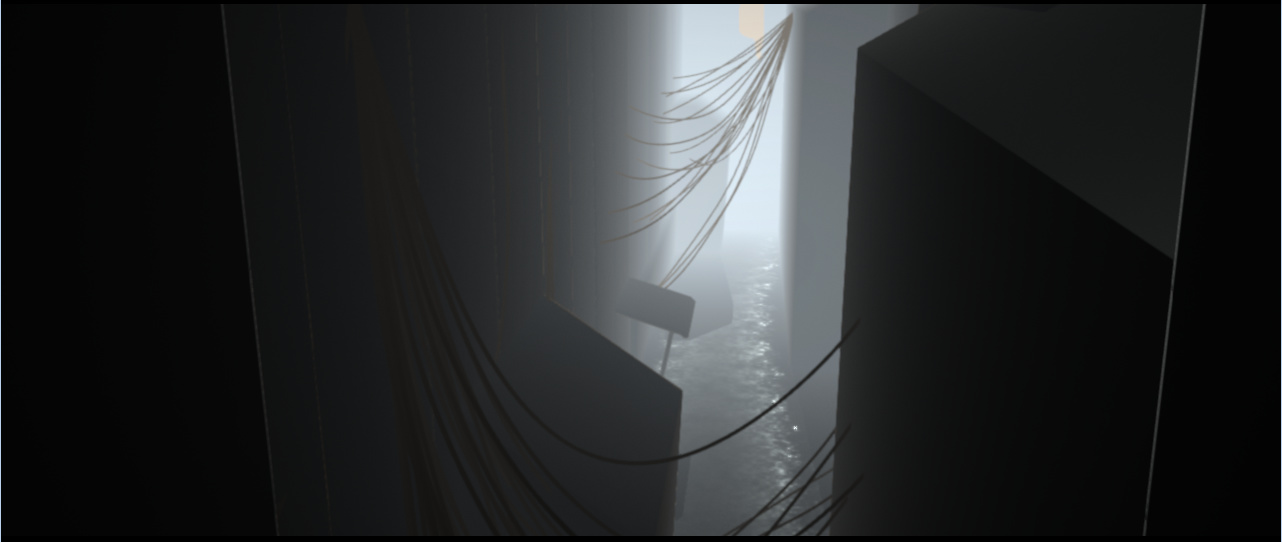
The wires make the scene more interesting and lifelike. Full size.
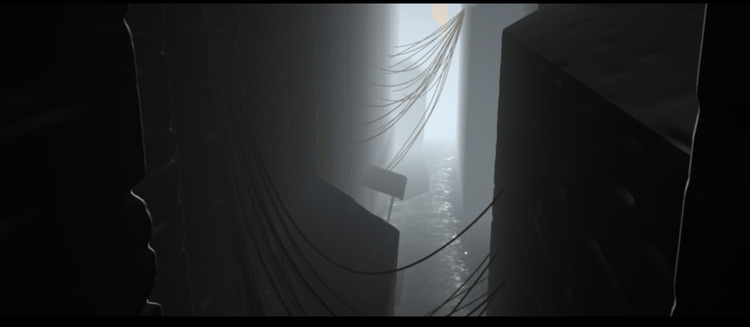
In the final version some noise was added to the distance field to give an impression of brickwalls. Full size.
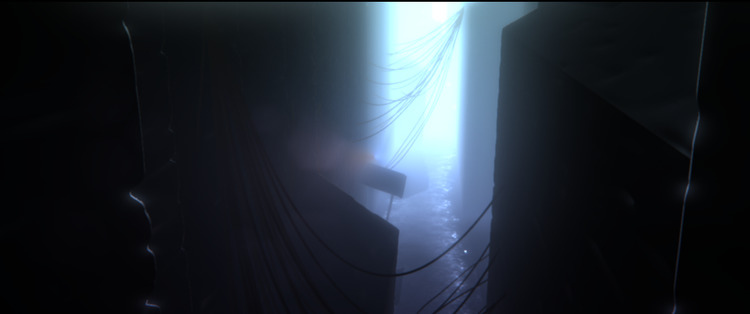
A color gradient, bloom, chromatic aberration and lens flares are added in post-processing. Full size.
The B-52 bombers are a good example of modelling with signed distance fields. They were much simpler in the party version, but we spiced ’em up for the final. They look pretty convincing from afar:
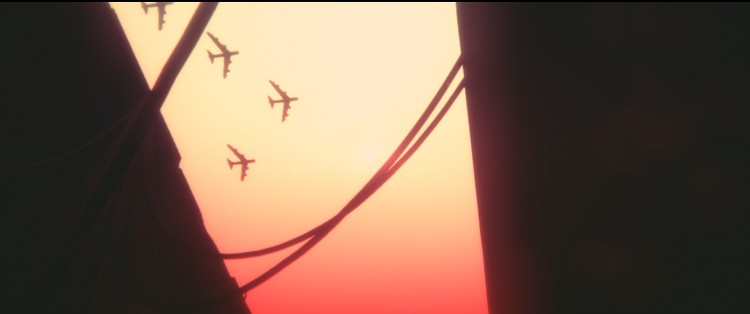
The bombers look OK at a distance. Full size.
However they are just a bunch of capsules. Admittedly it would’ve been easier to just to make them in some 3D package but we didn’t have any kind of mesh packing pipeline set up so this was faster. Just for reference, this is how the distance field shader looks like: bomber_sdf.glsl

They are actually very simple, though. Full size.
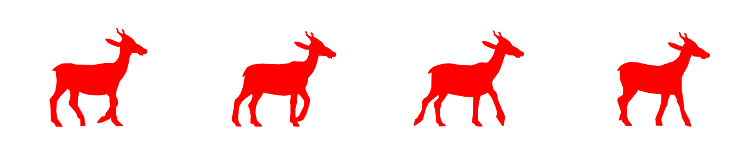
The first four frames of the goat animation.
The animated characters are just packed 1-bit bitmaps. During playback the frames are crossfaded from one to the next. They were contributed by a mysterious goatman.
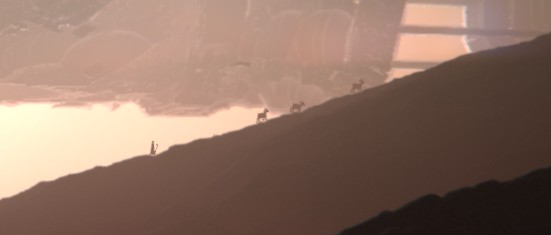
A goatherd with his friends.
The post-processing effects were written by varko. The pipeline is:
The lens flares follow pretty much the technique described by John Chapman. They were sometimes hard to work with but in the end still delivered.
We tried to use the depth of field effect with good taste. Full size.
The depth of field effect (based on DICE’s technique) is made of three passes. The first one calculates the size of circle of confusion for each pixel and the two other passes apply two rotated box blurs each. We also do iterative refinement (i.e. apply multiple Gaussian blurs) when needed. This implementation worked really well for us and was fun to play with.
The depth of field effect in action. The red picture shows the calculated circle of confusion for the DOF blur.
There is an animated parameter pp_index in Rocket that is used to switch between color correction profiles. Each profile is just a different branch in a big switch statement in the final post-processing pass shader:
vec3 cl = getFinalColor();

if (u_GradeId == 1) {
    cl.gb *= UV.y * 0.7;
    cl = pow(cl, vec3(1.1));
} else if (u_GradeId == 2) {
    cl.gb *= UV.y * 0.6;
    cl.g = 0.0+0.6*smoothstep(-0.05,0.9,cl.g*2.0);
    cl = 0.005+pow(cl, vec3(1.2))*1.5;
} /* etc.. */
It’s very simple but worked well enough.
There are two simulated systems in the demo: the wires and a flock. They were also written by varko.

Wires add more life to the scenes. Full size.
The wires are considered a series of springs. They are simulated on the GPU using compute shaders. We run multiple small steps of the simulation due to the instability of the Verlet integration method we use. The compute shader also outputs the wire geometry (a series of triangular prisms) to a vertex buffer. Sadly, the simulation doesn’t work on AMD cards for some reason.
The birds give a sense of scale.
The flock simulation consists of 512 birds with the first 128 considered the leaders. The leaders move in a curl noise pattern and the others follow. I think in real life birds consider the movement of their closest neighbours, but this simplification looks good enough. The flock is rendered as GL_POINTs whose size is modulated to give appearance of flapping wings. This rendering technique was also used in Half-Life 2, I think.
The traditional way to make music for a 64k intro is to have a VST-instrument plugin that allows a musicians to use their regular tools to compose the music. Farbrausch’s V2 synthesizer is a classic example of this approach.
This was a problem. I didn’t want to use any ready made synthesizer but I also knew from earlier failed experiments that making my own virtual instrument would be a lot work. I remember really liking the mood of element/gesture 61%, a demo by branch with a paulstretched ambient song. It got me thinking about implementing it in a 4k or 64k size.
Paulstretch is a wonderful algorithm for really crazy time stretching. If you haven’t heard about it, you should definitely listen what it can make out of Windows 98’s startup sound. Its inner workings are described in this interview with the author, and it’s also open source.
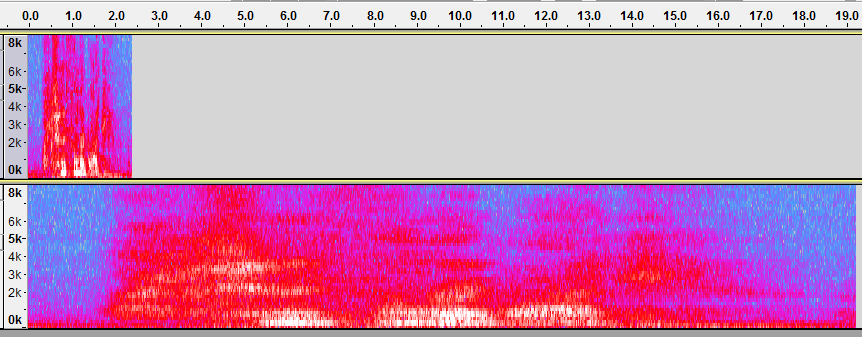
Original audio (top) and stretched audio (bottom) done with Audacity’s Paulstretch effect. Note how the frequencies also get smeared across the spectrum (y-axis).
Basically, as it stretches the input it also scrambles its phases in frequency space so that instead of metallic artifacts you get ethereal echoes. This requires of course a Fourier transform and the original application uses the Kiss FFT library for this. I didn’t want to depend on an external library so in the end I implemented a naive O(N2) Discrete Fourier Transform on the GPU. This took a long time to get right but in the end it was worth it. The GLSL shader implementation is very compact and runs pretty fast despite its brute-force nature.
Now it was possible to make swathes of ambient drone, given some reasonable input audio to stretch. So I decided to use some tried and tested technology: tracker music. It’s pretty much like MIDI2 but with also samples packed in the file. For example elitegroup’s kasparov (YouTube) uses a module with additional reverb added. If it worked 17 years ago, why not now?
I used Windows’ built-in gm.dls MIDI soundbank file (again, a classic trick) to make a song with MilkyTracker in XM module format. This is the format that was used also for many MS-DOS demoscene productions back in the 90s.
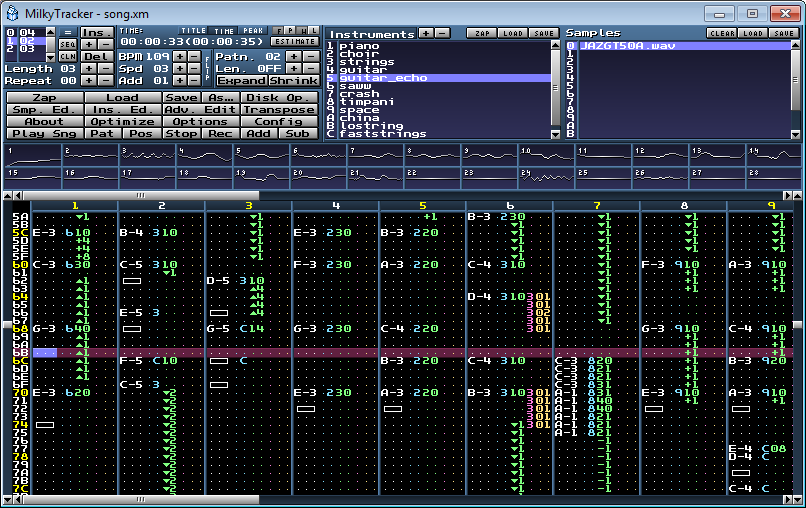
I used MilkyTracker to compose the original song. The instrument sample data is stripped off the final module file and replaced with offsets and lengths in gm.dls.
The catch with gm.dls is that the instruments, courtesy of Roland in 1996, sound very dated and cheesy. Turns out this is not a problem if you bathe them in tons of reverb! Here’s an example where a short test song is played first and a stretched version follows:
Surprisingly atmospheric, right? So yeah, I made a song imitating Hollywood songwriting and it turned out great. That’s pretty much all that’s going on the music side.
Thanks to varko for help in some technical details of this article.
You can calculate analytic derivatives for gradient noise too: https://mobile.twitter.com/iquilezles/status/863692824100782080↩
My first idea was to use just MIDI instead of a tracker module but there doesn’t seem to be a way to easily render a song to an audio buffer on Windows. Apparently at some point it was possible to do it with the DirectMusic API but I couldn’t figure out how.↩